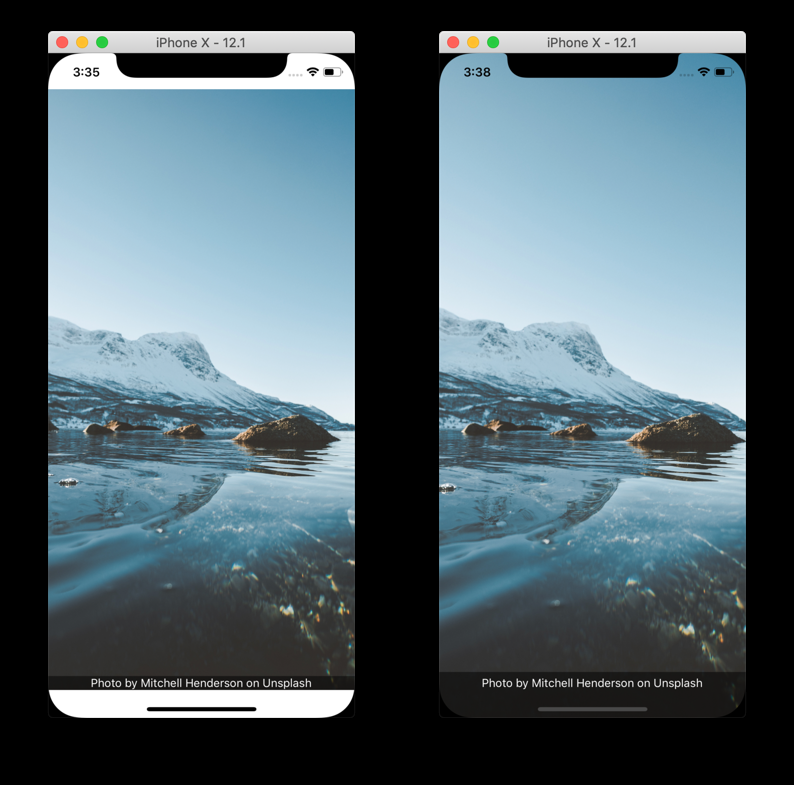
Have you ever launched your React Native app on a fancy new phone only to find your content hiding behind a notch or getting cut off by the home indicator? 😱
With today’s smartphones featuring notches, camera cutouts, gesture bars, and curved corners, it’s essential to design your app to respect these “danger zones.” In this tutorial, you’ll learn how to handle safe areas in React Native apps built with Expo using react-native-safe-area-context.
We’ll cover:
- What safe areas are and why they matter
- How to use
SafeAreaProvider,SafeAreaView, anduseSafeAreaInsets - Applying safe areas to scroll views, modals, custom headers/footers
- Best practices and common pitfalls
Let’s dive in! 🚀

🛡️ What Are Safe Areas and Why Should You Care?
Safe areas are parts of the screen not obstructed by device hardware or OS UI elements — like notches, status bars, home indicators, or navigation bars. If your content lands in those zones, it could become hard to read or interact with.
Safe areas dynamically adjust margins/padding so that your app content stays visible, readable, and tap-friendly across all devices.
🧰 Setting Up SafeAreaProvider in Expo
Expo apps include the react-native-safe-area-context library by default. If not, install it with:
1 | expo install react-native-safe-area-context |
Wrap your root component in SafeAreaProvider:
1 | import React from 'react'; |
This ensures that all child components can access safe area data.
✅ Using SafeAreaView to Respect Safe Zones
Replace your
1 | import { SafeAreaView, StyleSheet, Text } from 'react-native-safe-area-context'; |
🧠 Custom Layouts with useSafeAreaInsets
Need fine-tuned control? Use the useSafeAreaInsets hook:
1 | import { useSafeAreaInsets } from 'react-native-safe-area-context'; |
Then apply insets directly to your component styles. This is great for headers, footers, or any layout requiring edge-specific adjustments.
Example:
1 | <View style={[styles.header, { paddingTop: insets.top }]}> |
📜 Scrollable Screens and Safe Areas
For ScrollView and FlatList content, you can:
Wrap the scroll view in SafeAreaView.
Or apply insets as padding using the hook.
Example:
1 | <ScrollView |
🧩 Safe Areas in Modals
Modals are tricky because they might not inherit the safe area context. To fix this:
1 | <Modal visible={visible}> |
This ensures the modal also respects the device’s safe zones.
🧱 Custom Headers and Footers with Safe Area Awareness
Use the edges prop to apply padding only where needed:
1 | <SafeAreaView edges={['top', 'left', 'right']} style={styles.header}> |
Best Practices and Common Pitfalls
✅ Always use
✅ Import SafeAreaView from react-native-safe-area-context.
🚫 Avoid nesting SafeAreaViews unnecessarily.
🧪 Test on devices with and without notches (and in landscape mode).
📐 Use numeric padding values — avoid percentages.
🔁 If content disappears in a modal, add a SafeAreaProvider inside.
So next time you build that killer UI — make sure it lives in the safe zone. Your users (and their thumbs) will thank you! 🙌
Happy coding!